Sunday, July 29, 2007

Potting Amazon Swords For A Goldfish Tank

A Need For More
The goldfish tank was looking pretty lack luster. The only plants inhabiting the tank were java fern attached to driftwood. It looked nice, but the tank was missing some variety, and some tall plants to fill the upper portions of the tank. Julie and I decided the tank could use some sprucing up and we decided on amazon swords, since I had a plethora of them coming from a mother sword in my tropical planted aquarium. The next step was to figure out how to get them in there adequately.

Pot Them!
Our goldfish tank does not have a suitable substrate for plants, it has large river rocks in the bottom. This was a problem. Amazon swords need to have a good substrate to send their large root systems into, to secure them down and to get nutrients. A need fueled an idea . . . Pot Them! We headed out and got three 3" clay pots, making sure they had not been treated with anything. I rinsed them several times in hot water to make sure there wasn't any residue on them that would adversly affect our beloved goldfish. Then I set to work.

Potting The Swords

The first step was to get some gravel and put it in the bottom of the pots. I filled the pots about half way at first. Then went some Flourish Tabs I had left over and I nestled them into the gravel. I put one tab per pot. Next, another thin layer of gravel over the tabs. By the end of this the pots were almost 3/4 full of gravel.

Then I had to get some plants. We only needed 3, and I had many to choose from. Because we want these to be background plants, I wanted to find the 3 biggest and healthiest looking plantlets. First I cut the runner off of the mother sword and then inspected the plants and picked out the ones to use. I cut those off of the runner. Once they were cut off I trimmed any damaged roots and then wrapped the roots into a little ball to help keep them from getting damaged during the planting process. I then nestled them into the gravel in their prospective pots and filled the pots up the rest of the way with gravel, to hold the plants up. The end result was 3 nice looking amazon sword plantlets in some nice looking clay pots.

Once the swords get big, they will be repotted into larger pots. Now hopefully they will grow well provided the goldfish don't eat them!

Micro Worms

Micro Worms
I recieved a starter culture of micro worms yesterday. Today I set it up. Micro worms are similar to the walter worms and banana worms but are larger. They are easy to see; the walter worms and banana worms you can't really see, you can only see a shimmering on the surface of the culture media. Micro worms are a good first food for bigger fry, or as a second food for smaller fy.

Setting Them Up

First, add about a 1/2 inch or so of dry instant baby cereal. I use gerber mixed grain baby cereal. Then add water, tap water is fine, I ran it through a brita filter first, and mix it all together so it is pasty, but not watery. I found a fork the easiest to use.


Next, add a pinch or so of dry active yeast to the top of the cereal. The micro worms feed off of the yeast. Lastly, spread your micro worm starter over the top of the culture medium. If it is dry, add a touch of water to make it easier to spread. Be careful to not make it watery though.

Feeding Them to Your Fish
Soon you should see the worms climbing up the sides of the container. To feed them to you fry, simply wipe them off and swish them into the tank. They will live for about 6 hours, so do not over feed or they may die and dirty the water. These can usually be kept going for a month, maybe 2 by adding a small pinch of yeast to the culture once a week or so. If the culture gets watery, add some more baby cereal or oatmeal (whatever you are using). When the culture starts to smell bad its time to start a new one. Simply follow the steps above again and add a spoonful of your old culture to the new one. Micro worms can be used as a substitute or an addition to baby brine shrimp. If you only have a small amount of fry and don't want to go through the hassle of hatching baby brine shrimp every day, these can be a great alternative.

Thank you malaysiantrumpetsnails on aquabid for the great starter culture!

Monday, July 23, 2007

Common Livebearers

Live bearers are often one of the first types of fish people get when starting out in the aquarium hobby. It is exciting to have new baby fish so easily! They are very colorful and active, which draws new hobbyist to them. The livebearers most people start out with belong to the family Poeciliidae.

Poeciliidae is considered a livebearing tooth-carp family. They originate from North, Central and South America. Many have been introduce to nonnative areas. The most commonly available in local fish stores include guppies, mollies and platies. While most livebearers do best in harder water (10 to 30 dH) most are adaptable fish, just needing clean water and a varied diet to do well. These fish are unique in that they do not lay eggs, but instead give birth to live babies. The males possess a specialized anal fin called a Gonopodium that they use to internally fertilize the eggs of the female. The female then carries them inside of her until they are mature. Upon birth the fry are quite large compared to egg layer fry and they can swim right away. In the aquarium they often readily take ground flake food almost immediately. Another interesting aspect of livebearer reproduction is that the females can store sperm for later use. It is said that livebearers can give birth to up to 9 batches of fry from one breeding.

Guppies may be one of the most popular aquarium fish because of their flowing tails and bright colors. Guppies naturally come from northeastern South America and islands off of the northeastern coast. However, because they love to eat mosquito larvae, they have been introduced into many areas. There are many different strains of guppies, they are created by line breeding. Because of this fancy guppies are not as hardy as their wild colored counterparts (called "common guppies"). Common guppies are usually sold as feeder guppies. Guppies are best kept in a 10 gallon tank or larger if you want a group of them. They require clean water and frequent small meals. Because of their long flowing fins many other fish are tempted to nip at them, so choose tank mates carefully. Guppies are usually best kept in groups of 1 male to every 2 or 3 females. However, if you do not want them to breed and just want a fantastic display, a tank full of male guppies only can be done. There may be some occasional fin nipping though. Guppies are tolerant of a wide range of temperatures and water conditions. As long as you keep your water clean guppies should be able to adapt to most pH and hardness ranges. Many people find their guppies do a little bit better with some aquarium salt added to the tank water.

Mollies are also very popular. Many mollies are sensitive to water quality. Mollies can range in size from an inch up to 6 inches. It usually a good idea to keep mollies in slightly larger tanks, starting at 30 gallons. They can be a bit more aggressive than some other fish, not to mention some can get quite large. Mollies are omnivores, but should be fed a lot of plant food. Adding spirulina flakes to their diet, or allowing algae to grow for them to graze on will keep them looking their best. As with the guppies mollies do best in groups of 1 male for every 2 to 3 females.

Platies are perhaps one of the most varied of the livebearers after guppies when it comes to color strains. There are many different varieties of guppies. At any given time at Pet World there may be 10 different types or more. There care is about the same as most other livebearers. Usually reaches sizes of up to 2 inches, they can be kept in 10 gallon tanks or larger. They need clean water, and are very adaptable. Again they do best in groups of 1 male for every 2 to 3 females. They will do fine on regular tropical flake food, but their colors look best if given more variety. Adding spirulina flake and some frozen foods like blood worms and brine shrimp will really make these fish look good!

Swordtails are perhaps one of my favorite out of the common livebearers. The males sport a long extension of their tail that gives these fish their common name. Females are usually rounder and do not have the "sword". Swordtails can get up to 5 inches and come in a variety of colors. It is best to keep these fish in tanks of 20 gallons and up. They do best in the standard male to female ratio of 1 male for every 2 to 3 females. Something that is very interesting about swordtails is that they do change gender with some frequency. When born, all swordtails are female. If at a young age a fish develops into a male, it will stay small in size. If a fish grows as a female and later turns into a male, he will be a large male.

Half Beaks

Half beaks are (mostly) a live bearing fish belonging to the family Hemirhamphidae. Half beaks have an wide range of reproductive modes ranging from egg-laying and ovoviviparity through to true vivipary where the mother is connected to the developing embryos via a placenta-like structure. Half beaks are a long, laterally compressed fish. Half beaks range in size depending on species. The dorsal is set farther back on the body than most fish. The half beak has a long lower jaw that is immovable and a shorter upper jaw that can be moved up and down. Coloration is variable depending on species.

Half beaks can be found in fresh water, brackish and salt water environments in coastal regions of southeast asia, Thailand, Indonesia, Malaysia, Singapore, Sumatra and Borneo. Their ideal pH range is 7 to 8.5 and temperatures of 70 to 86*f. Some half beaks need to have salt added to the water. The minimum tank size for most half beaks should be 20 to 30 gallons. They do better in shallower, longer tanks than in higher, shorter tanks. They tend to inhabit the upper portions of the water column.

Half beaks are good jumpers, so a secure, tight fitting lid is a good thing to have. Some floating pants, live or fake, should be added to the tank to provide a place for them to retreat. Many people also recommend putting plants around the edges of the aquarium, that reach the surface. This is to try and keep the half beaks from running into the sides of the tank when startled. Males will squabble with each other on occasion and they do best in groups of 1 male and 3 or 4 females.

Half beaks are surface feeders that will take flake food, but should also be fed a wide variety of frozen or live foods. They will take blood worms, black worms, tubifex worms, mosquito larvae, brine shrimp and small insects. Many half beaks will not breed if they are only fed on flake food. Half beaks require clean water and frequent water changes to be successfully kept and bred.

Half beaks are one of the harder to breed of the live bearers. Still born babies are a common problem. Feeding a greater variety of food and adding vitamins to the diet can help alleviate this problem. Males possess a specialized anal fin called an andropodium. The andropodium is similar to the gonopodium of poecilid livebearers After successful fertilization the female will give birth anywhere from 5 to 8 weeks to 10 to 70 young. Gestation and number of fry depends on species. The newborn fry will take baby brine shrimp and powder flake food. Parents will eat the fry, so they need to be separated into their own tank.

Different species may have slightly different care therefore It is best to research the needs of the specific species in question.

Update on Killies and Pictures

An update on my killies. My 2 A. Bitaeniatum "ijebu ode" are doing well. I lost the first 9 eggs I collected to fungus:( I'm sure there will be plenty more to come though. The female is still eating really well, the male is still a bit picky. The "dwarf baby tears" that I had planted in their tank all died. I will be getting something to replace it soon. The fish are starting to get a bit more bold, not darting into hiding every time I come up to the tank. I think they are finally starting to realize that human=food. Here are some bad pics I took of them with my camera phone:

Female:

Female Killie

Male Killi

Male:

A better shot of the male:

Male Killi

Pictures of My Killi Set Up

I took some bad pics of my killie tank with my camera phone. I put a black sweater behind it for the picture because I haven't gotten a background yet. The container & the medicine bottle next to it have eggs in them (and some extra plant stems), I have like 12 or 13 eggs now. Plants are rotala magenta, bolbitis fern, dwarf baby tears and on the left are 2 little stems of glosso. The light is a 13 watt light I got from lowes, 6700K i think was the color temp. It was either that or 6500K. No filter, daily water changes. I am keeping the water level low until I make some kind of top as I don't want them to jump. It is usually slightly higher than this though, I ran out of aged water to fill it up more. I'm not sure how the bolbitis fern will do without current but maybe with the daily water changes it will be ok. The wood is grape vine, boiled many, many times before it would sink. Fish are 2 A. Bitaeniatum "ijebu ode" and there is 1 amano shrimp in there. In the back left corner is the spawning mop . . . where they lay their eggs.

I purchased some live food cultures and 16 petri dish things to keep eggs and fry in. The live foods were walter worms and banana worms. Now I need to order some brine shrimp eggs.

Close up of the tank2ish gallon Kili tank

I Have Been Converted

I have been converted to the world of Killies. Today Paul, Don and I went on a little road trip to a fish store in Buffalo. They had an awesome selection and they had killies . . . more than just the golden wonder killies I am used to seeing in stores. Actually, I don't think they had any golden wonders. Anyway, the two that caught my eye were blue gularis and A. Bitaeniatum "ijebu ode". After speaking quickly with Paul (meaning, being persuaded by Paul) when my turn came up to get fish I heard myself asking for a pair killies . . . I decided on the Bits. The gularis are a gorgeous fish, but they get kinda big and wouldn't do well in my 60 gallon with the angelfish. I had the guy helping us grab a male and the female he was showing off for . . . and then he proceeded to drop the male on the floor. He quickly grabbed him and put him in the specimen container with the female, which he immediatly showed off for. He obviously was not phased so I said "I'll take em!". I also grabbed a plant and a trio of rasboras.

The fish did fine on the way home, but not having intended to get anything that wasn't going in my 60 gallon I did not have a place to put them. I was thinking I was going to have to put them in a breeder net, but lightly mentioned they would be happier in a tank to my girlfriend. She surprisingly did not object to another tank, so the fish went into a bucket and I got to work. I am now currently setting up an old 2 gallon slate bottom tank we had previously used for a betta.
A thin layer of black sand, a small piece of driftwood and some live plants are going to be the decor. I will have to go to lowes or home depot for a light for the plants, but that should be all I have left to get.

Starting Out With Goldfish

Keeping goldfish can be a fun and rewarding experience if done correctly. If properly cared for, goldfish can easily live to be 15 years old, and have been known to live to be 43 years old.

Size Considerations
Goldfish get very large. Fancy varieties often get 6 to 8 inches and the single tailed varieties often get up to a foot and a half long. Not only do goldfish get long, but they have a very large body mass. This makes for a very large fish. Adult goldfish (6 inches or larger) should have at least 30 gallons per goldfish. Very large single tailed goldfish should really have about 50 gallons per goldfish. This usually means they are best kept in an outdoor pond. This may seem like a lot of water for one fish, but goldfish produce a lot of waste, so they need a lot of water to dilute this waste. At a stocking density of 30 gallons per 6 inches of goldfish, or 5 gallons per inch of goldfish, weekly 50% water changes should be performed to keep the nitrates below toxic or harmful levels.

What you need
When people buy goldfish in stores, they are usually buying a cute little 1 inch fish and a gallon bowl. In these conditions the fish usually do not live very long. They may last a few months before they finally perish. To successfully start out with young goldfish, a 10 gallon tank can be used, along with a power filter overrated for your size tank. For example, if you have a 10 gallon tank, buy a filter that is rated for 10-20 gallons rather than one that is rated for 5-10 gallons. A thermometer is also useful so you can monitor water temperature. Gravel at a pound per gallon will make the tank look nice and provide more surface area for good bacteria to grow. I usually recommend a heater as well, to keep the water temperature steady, but it is not a necessity. You will also need a water conditioner that removes chlorine and chloramines from your water. All of your equipment should be purchased and set up before you buy your fish.

Setting Up
Once you have purchased all of your equipment it is time to find a suitable place to set it up. A 10 gallon tank full of water with gravel and decorations can weigh up to 100 pounds. To be safe, buy a stand made for the tank. If you want to use something else, keep in mind how much the tank will weigh and make sure that all four of the corners are evenly supported. The tank should not be in direct sunlight or in front of a heating or cooling vent.

Now that you have found an appropriate place to set up your aquarium, rinse your gravel in room temperature water to remove shipping dust and place it in your aquarium. Sloping it so that it is higher in the back and lower in the front usually gives a nice look to it. Set a bowl or plate onto the gravel and start filling your aquarium with room temperature water, pouring it over the plate or bowl so you do not disturb the gravel bed. Once your tank is full, you can put your filter on it. Follow the directions that came with your filter to get it started. If you purchased a heater, set your heater in the aquarium but wait at least 15 minutes before plugging it in. Now you can add the water conditioner as well. Let your tank run for a full 48 hours before you go to purchase your new little fish. Now would be a great time to decorate the aquarium with fake plants or other decorations. Try to make the aquarium look appealing without fish in it. If the tank looks good without fish, you will not be relying on the fish to make it look full and interesting and you will be less likely to want to overstock it.

Cycling and Getting Your Fish
Once your tank has been set up for 48 hours you can do one of two things. You can go out and purchase 1 (only one!) small goldfish. Or you can fishless cycle your tank using pure ammonia. For a how to on fishless cycling go here:Fishless Cycling. When you purchase your goldfish, also purchase food at the same time. Buy a small bottle and put the date on it that you bought it. You should replace it after about 6 months.

If you decided to buy one little goldfish (about an inch long). You will now need to watch your water quality carefully for the next 6 to 8 weeks. Feed your fish very lightly and test your water often, every few days is good. You can purchase a test kit at a store, or many local fish stores will test the water for you. Your tank is going to be going through what is called the cycle process or new tank syndrome. This is the time period in a new tank that good bacteria grow in your gravel that help to break down the waste from your fish. Until this bacteria grows (which can take a total of 6 to 8 weeks in most tanks) your water can become toxic to your new little fish. Regular testing allows you to see when it is toxic.

If the ammonia or nitrite reaches 1.0ppm do a 25% water changes to bring the level down a little bit. If the nitrate ever goes about 20ppm again, do a 25% water change to lower the level. You may end up doing several 25% water changes in a week. Your pH is not much of a concern as long as it remains stable. Your tank will probably also be cloudy during at least some of this time. This is perfectly normal and will eventually go away on its own. Once your tank has fully cycled you can add 1 more small (1 inch) goldfish. If this is your first time keeping goldfish, I recommend fantail goldfish, or oranda goldfish. I do not recommend you get the common single tailed goldfish as they will outgrow a 10 gallon very quickly.

Maintaining Your Tank
Now that you have your 2 small fancy goldfish and a fully cycled aquarium, you will need to maintain it. Once a week you should change about 50% of the aquarium water with fresh water. I like to use water that has been aged for 48 hours and has some water condition in it to remove chlorine and chloramines in it. You will also need a gravel syphon. There should be directions on the package of how to use the gravel syphon. Before you start draining the tank make sure you unplug all of you aquarium equipment (filter, heat and light) for safety. Each week clean one half of the gravel, and alternate between sides with each water change. Once you have drained half of the water, slowly refill it with the aged water you had set aside.

Upgrading
In about a year you will need to think about upgrading your goldfish to a larger aquarium. A good next step up would be a 30 gallon tank. Eventually you will need about 60 gallons for your 2 goldfish, because they will get big! When purchasing aquariums, try to get ones that are wider (deeper), rather than longer as this will help make the tank look fuller than it is because the viewing panel will be smaller. For example, instead of buying a 4 foot long 55 gallon tank for your 2 goldfish, consider buying a 56 gallon column tank that is only 30 inches long. You will have roughly the same amount of water space, but the tank will look fuller than the 4 foot tank would.

To review what you will need to start off and maintain two small, 1 inch, fancy goldfish:


1) 10 gallon tank
1) power filter rated 10-20 gallons
1) 10 pound bag of gravel
1) Thermometer
1) aquarium heater (optional, but recommended)
1) bottle of chlorine and chloramine removing water conditioner
1) gravel syphon
1) test kit that tests for ammonia, nitrite, nitrate and pH
1) container of a high quality goldfish food

Wait at least 6 to 8 weeks, or until your tank is fully cycled to add a second small goldfish. Do not keep more than 2 small goldfish in a 10 gallon aquarium.

Do weekly 50% water changes using a gravel syphon to clean the gravel at the same time.

Upgrade your goldfish to a bigger aquarium in about a year or so.

Have fun with your new finned friends!

Image from: http://www.flickr.com/photos/beastman/378773926/

Keeping Goldfish Outdoors

Goldfish were originally bred for and are best suited for outdoor ponds. Their large bio-mass and active demeanor means that they need a lot of water space per fish. More so than most tropical fish. Their feeding habits also make them more suited for outdoor living. Goldfish tend to feed through out the day, scavenging for little tidbits of food here and there. Outdoors bugs and plant bits are always going into or growing in the pond, offering the goldfish the ability to scavenge and eat small amounts of food often. Some people swear that the natural sunlight does wonders for their color too, but it would be hard to distinguish if this is more from the natural foods or if it really is from the sunlight.

When planning for goldfish keep in mind the amount of water per fish needed and wether or not you want them outdoors year round. If you live in a cold climate you will need to know at what depth water freezes solid. Here in Rochester NY, it is usually recommended to dig ponds at least 3 1/2 feet deep, with 4 being a safer bet. Because outdoor ponds do not usually get as frequent water changes as indoor tanks and because goldfish tend to grow larger outside, 50 gallons of water per goldfish is usually recommended.

All types of goldfish can be kept in outdoor ponds. The less fancy varieties usually are easier to keep outdoors, however the fancy varieties can be kept outside too. It is usually best not to mix the fancier types with the single tailed goldfish (comets, shubunkins ect.). Celestial eyed goldfish and bubble eyed goldfish are best kept only with each other as they often have a hard time competing for food with the other types that can see better and the bubble eyed goldfish can easily have their bubbles injured.

When outdoors goldfish do not need to be fed often. Usually once a day or every other day is sufficient. If you want to feed them more often (because its fun!) just feed smaller meals. The goldfish will look hungry, they always think they are hungry, but they usually find enough bugs and plant matter to eat in an outdoor pond.

It is important to have good filtration and to keep it maintained, just like in an aquarium. Goldfish are dirty, inside and out, and an outdoor pond is also going to have many more creatures visiting it and adding to the amount of waste. Most commercially available pond filters are adequate for an appropriately stocked pond. You can also make your own filter using a pond pump, a plastic barrel, some tubing and some imagination.

Live plants are usually an important part of a pond, both for aesthetic as well as functional reasons. To prevent a large amount of algae growth you will need a decent amount of thriving plants to out compete the algae. Anacharis (elodea) is an all time favorite as it is easy to grow, grows fast and the goldfish enjoy it as a snack too. Lilies are also helpful (and beautiful!) as their large pads help to block sunlight to the water. Floating plants like water lettuce and water hyacinths are attractive and will also help with algae. Goldfish enjoy nibbling on their roots too. Live plants also provide a place for goldfish to spawn and for their fry to hide.

Keeping goldfish outdoors is a lot of fun and can be a real joy when done correctly. To be successful just remember not to over stock your pond, 50 gallons per goldfish is a good starting place, and to keep your filtration maintained. You will be pleasantly surprised at how beautiful and how big your goldfish get when outdoors.


White Cloud Minnows

White cloud minnow

White cloud minnows (Tanichthys albonubes) is a member of the carp family (Cyprinidae). White cloud minnows are naturally found in China and Vietnam. The fish gets its common name from the mountain it was discovered on (White cloud mountain). This species was discovered in the 1930's.

White cloud minnows are small fish, growing to an inch to and inch and a half. They are a silvery green color with red fins. A gold variety is also available, with a golden body and red fins as well as a long finned variety (often called "meteor minnows"). Males are generally brighter than females and often display by "shaking" their fins.

In the aquaria white cloud minnows are peaceful schooling fish. They should not be kept with large fish as many find them to be a tasty snack. White clouds are considered a hardy fish, being adaptable to a wide range of water parameters. They do best in temperatures between 64*f and 72*f and can survive water temperatures as low as 41*f and as high as 90*f for a short time. The pH level should be between 6.0 and 8.0. White cloud minnows were once known as "the poor man's neon" as they are brightly colored but were much cheaper than neon tetras.White clouds are easy to feed and often take flake food with gusto.

White cloud minnows are easy to breed. Prior to breeding they should be conditioned on live and frozen foods such as brine shrimp, mosquito larvae and blood worms. White clouds are egg scatterers and should be removed after breeding as they may eat their own eggs and young.

Because white cloud minnows are tolerant of a wide range of temperatures they can be housed in small outdoor ponds in many areas, for at least part of the year. They also do well in unheated aquariums.

White cloud minnows are thought to be extinct in their native waters in China.


Goldfish Varieties

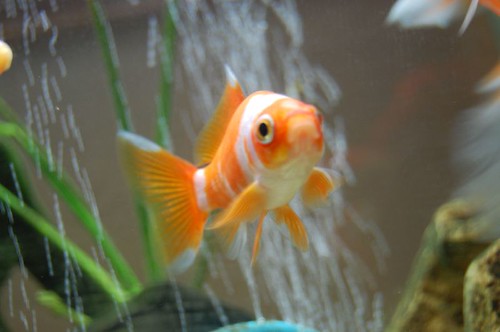
There are many different types of goldfish. Even though they may look different they are all the same species of fish, and can interbreed and produce viable young. Just like there are different breeds of dogs, but they are all still dogs. Goldfish get large, with the smallest usually getting up to 8 inches, and the largest up to 18 inches. They are best suited for large aquariums or ponds. For indoor aquaria a 6 inch goldfish should have at least 30 gallons of water to itself. Outdoors, 50 gallons per goldfish is usually a good place to start.

I will give a brief overview of some of the varieties of goldfish here.

Comet or common goldfish - These are long, slender fish with a short single tail. They are often sold as feeder fish. They come in gold, gold and white, all white, grey, brown or red and white.

Sarasa comet - like the common goldfish, but their coloration is usually orange and white or red and white. They also have a single tail but it is usually longer than the common goldfish's tail.

Shubunkin - Again, these have the same body type as the common goldfish, long and slender but have calico color. These fish are usually blue and orange with black spotting and sometimes have patches of white as well. They also usually have longer tail fins than the common goldfish, but not always.

Wakin (pronounced wah-keen)- This type of goldfish is not often available in pet shops. It has a slender body and a double tail fin. Wakin goldfish's tails are flatter than a fantail's and are best viewed from above. Wakin are most often available in red and white coloration, but can come in just about any goldfish color.

Jikin
- The Jikin is developed from the wakin. The jikin's tail when viewed from behind should look like an X. The most desirable color pattern with Jikin's is an all white body with red on the lips, fins and gill plates. The jikin's body tends to be a bit more robust than a wakin, but not as egg shaped as fantail goldfish. These are also not a very common type of goldfish.

Fantail - Fantail goldfish have an egg shaped body, a double tail and come in many colors. Fantails are one of the most commonly available of the fancy goldfish. They are thicker than the comet type goldfish so still require a lot of space.

Oranda - Oranda goldfish have the same body shape as a fantail goldfish, but also have a large growth on their head. This growth is called a wen. The wen should be well developed and sometimes will cover the eyes. Some people like when it does this, others do not. To get the best wen growth from a young oranda, a higher protein diet should be fed for the first 2 years of its life.

Ryukin - Similar in shape to the fantail, but these goldfish have a humped back and much deeper body. The hump starts just after the head. These fish tend to have floating problems because of their deep bodies.

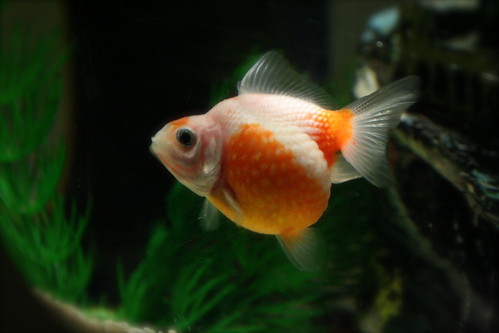
Pearlscale - These goldfish are much rounder than fantails, and their most distinctive feature is that each scale is raised and gives the appearance of a pearl. These are one of the harder to care for goldfish types, they need extremely clean water and often need supplemental calcium to maintain the pearled look.

Telescope eyed - Same body shape as a fantail, but should have longer fins. The eyes protrude outward from the head and should be evenly sized.

Moor - A velvety black telescope eyed goldfish.

Pompom - pompom goldfish can have a dorsal or not. Their body shape is the same as a fantail. They get their name because of the pompom like growths just below their eyes. These growths are actually enlarged nasal lobes.

Demekin - A demekin is essentially a cross between a telescope eyed goldfish and a ryukin. They should have the body shape of the ryukin with the protruding eyes of the telescope goldfish.

Veiltail - A goldfish with the body shape of a fantail but with very long, flowing fins. The fins should droop off of the body and should be at least 2/3 rd's the length of the body. These goldfish require very clean water to keep their long fins in good condition.

Phoenix eggfish - not a very common variety of goldfish, it has an eggshaped body, no dorsal fin and long flowing cadual (tail) fin.

Ranchu - Ranchu have no dorsal fin, have an arched back and the tail is tucked at a 90* angel. Their body is egg shaped. The Ranchu may or maynot have head growth (wen).

Lionhead - Similar to the ranchu, with no dorsal fin, but the back should be in a straight line and it should have a well developed wen.

Celestial eye - This fish has no dorsal fin, its back is in a straight line. It has no head growth and the eyes are turned so they are pointing upwards, as if looking to the heavens. These fish sometimes have a hard time finding food and are best kept only with other celestial eyed goldfish.

Bubble eye- These goldfish are basically celestial eyed goldfish with large fluid filled sacks under each eye. The bubbles should be evenly shaped and sized. Bubble eyed goldfish should be kept only with other bubble eye goldfish and there should be no sharp objects in the tank. Sometimes they also require the intake tubes of power and canister filters to be covered with a sponge so they do not catch their bubbles in them.

images from:

http://www.flickr.com/photos/subflux/624129718/

http://www.flickr.com/photos/80434490@N00/464831457/

http://www.flickr.com/photos/tombooth/546539003/

Amazon Swords

There are two plants commonly sold as amazon swords. They are Echinodorus bleheri and Echinodorus amazonicus. E. bleheri is sometimes called the broad leafed amazon sword, and E. amazonicus is occasionally referred to as the narrow leaf amazon sword. I have read and heard that E. bleheri is the more commonly available of the two. Hybrids and cultivars are also available for sale.

These large plants can make a beautiful focal point in an aquarium. They are best suited for large aquariums as they can get anywhere from 12 inches to 20 inches, occasionally bigger. Higher light levels make them stay a bit shorter and look more full. They need a nutrient rich substrate. Adding clay or laterite or something similar under the gravel or using a plant specific substrate will help keep these plants happy. If you have just regular gravel, adding root tabs at the base of the plant will help it out. Their roots grow very large so a thicker, loose substrate bed is a good idea. I have my substrate at about 4 inches deep and the roots of my swords go down to the glass on the bottom and spread outwards. The amazon swords also seem to benefit from added iron. Their leaves tend to turn yellow and die off quicker without it. I have read that they do best in softer water, but I have somewhat hard water and have no problems growing them and getting planlets from them.

Often when you buy an amazon sword they have been grown emerged (out of the water). It is easier for the growers to grow them this way. Because they are grown like this, often when you take them home the leaves will suddenly start to die off. This is because of two reasons. One, the plant needs to shed its emerged leaves and grow leaves more suitable for submerged living. The second reason is transplant shock. It is common for plants to loose their leaves and grow new ones when moved. I have found that the amazon swords grow their new leaves in very quickly. If you purchase them in a pot they are sometimes less likely to loose their leaves when brought home.

Good List of Plant Books

Left C on the aquaticplantcentral.com forum posted this great list of recommended plant books. Left C said I could repost it here. Does anyone have any of these? Did you like them? I am also posting this over on the Book Club Blog.


Aquarium Plants (Hardcover) by Christel Kasselmann (Author), Ulf Kotlenga (Translator)
http://www.amazon.com/Aquarium-Plant...6315280&sr=1-2

Ecology of the Planted Aquarium: A Practical Manual and Scientific Treatise for the Home Aquarist (Hardcover) by Diana L. Walstad (Author)
http://www.amazon.com/Ecology-Plante.../dp/0967377307

Tropica Aquarium Plants Catalogue, Expanded Second Edition (Spiral-bound) by Holger Windelov (Author)
http://www.amazon.com/Aquarium-Plant...315984&sr=1-26

Aquarium Plants: The Practical Guide (Hardcover)
by Pabloo Tepoot (Author), Ian Tepoot (Editor), Judy Leiby (Illustrator)
http://www.amazon.com/Aquarium-Plant...6315280&sr=1-8

Planted Aquariums: Creation and Maintenance (Hardcover)
by Christel Kasselmann (Author)
http://www.amazon.com/Planted-Aquari...6679817&sr=1-5

Encyclopedia of Aquarium Plants (Hardcover) by Peter Hiscock (Author)
http://www.amazon.com/Encyclopedia-A...6315280&sr=1-1

Aquarium Plant Paradise (Hardcover) by Takashi Amano (Author)
This is a very good book that has a lot of "how to" info.
http://www.amazon.com/Aquarium-Plant...315280&sr=1-12

Nature Aquarium World Volume 1 (Natural Aquarium World) (Hardcover) by Takashi Amano
{Strangely, this one isn't listed on the USA site. It's on the UK site though.}
http://www.amazon.co.uk/Nature-Aquar.../dp/0793800897

Nature Aquarium World Volume 2 (Hardcover) by Takashi Amano (Author)
http://www.amazon.com/Nature-Aquariu...315280&sr=1-16

Nature Aquarium World: Book 3 (Hardcover) by Takashi Amano (Author)
http://www.amazon.com/Nature-Aquariu...315280&sr=1-18

A Barry James book was my first plant book. It's little but it sure helped me to get started.
A Fishkeeper's Guide to Aquarium Plants: A Superbly Illustrated Guide to Growing Healthy Aquarium Plants, Featuring over 60 Species (Hardcover) by Barry James (Author)
http://www.amazon.com/Fishkeepers-Gu...6324425&sr=1-1

There's many small paperback books published by Barrons that have good info and they are fairly cheap.

I saw this one listed at the AGA site but I haven't looked at it. It look's good.
The Aquarium Plant Handbook
New from Oriental Aquarium, this 185-page full color book is more than double the size of Oriental's two previous "catalogue" books, features new photographs and text descriptions of most aquarium plants, and an introduction by Takashi Amano. A great value for a reference book!
$25 (AGA members)
$30 (non-members)
http://www.aquatic-gardeners.org/bookstore.html


Aquarium Plants Manual by Ines Scherumann: http://www.bigalsonline.com/BigAlsUS...umplantsmanual

Plants for Your Aquarium by Wolfgang Gula: http://www.bigalsonline.com/BigAlsUS...oryouraquarium

The Simple Guide To Planted Aquariums (Simple Guide to...) (Paperback) by Terry Ann Barber and Rhonda Wilson
http://www.amazon.com/Simple-Guide-P...1398471&sr=1-1

The Simple Guide To Planted Aquariums (Simple Guide to...) (Paperback) by David E. Boruchowitz
http://www.amazon.com/Simple-Guide-F...1398471&sr=1-3

The Natural Aquarium : How to Imitate Nature in Your Home (Hardcover) by S. Yoshino
http://www.bigalsonline.com/BigAlsUS...aturalaquarium

Barron’s Aquarium Designs Inspired By Nature by Peter Hiscock
http://www.bigalsonline.com/BigAlsUS...spiredbynature

Fish and The "Outside" Environment

Due to an eye injury in one of my two cats, my bedroom has needed to be in complete darkness. She has a scratch on her cornea and is being given a pain killer that is applied directly to her eye. This causes her pupil to dilate, so she needs complete, or near complete darkness or it will hurt her eye. Both the fish tanks are in the bedroom. The gold fish tank is easy, just keep the light off. They won't care to much and the java fern will survive. The 60 gallon tank however is heavily planted and cannot go a week or so without light, so I have taped garbage bags around the tank. This way the lights can be on, but the light exiting the tank in minimal. My fish seem to find this very interesting, or perhaps I am just finding their reactions very interesting.

The fish are all constantly huddled near the small opening, trying to see outside of their aquarium. I have always noticed that my fish watch me and react to changes outside of their aquarium. I just wasn't sure how much they really cared. This has led me to believe that they are very interested in what is going on outside the tank. Every time I happen to be going by the aquarium, I can see at least 4 or 5 little fishy faces peering out of the gaps between the garbage bags. I was not really that surprised to see that the angelfish and the gouramis and dwarf cichlids (A. thomasi) were curious, as they seem to be a little smarter. However, even the harlequin rasboras and the hatchet fish are often peaking out into the world. The botias don't seem to care one way or the other however.

This makes me wonder about fish in stores, where there are constantly people going by. I wonder if they enjoy seeing all the different people or if it stresses them out. I know that the Discus at the store I worked at often were at the front of the glass, wiggling excitedly for people. I think they felt secure in their tank. It was planted and they had places where they could be out of sight if they wanted. I wonder to what extent their inside environment affects how they react to their outside environment. For example, if they feel more secure inside the aquarium, will they be more likely to pay attention and react positively to the outside world? I am thinking yes.

photo credit: http://www.flickr.com/photos/swambo/158783218/

Walter Worms and Banana Worms

The two live food cultures I had ordered for my baby killies (when ever I get some to hatch) are walter worms and banana worms. They arrived in little containers and smelled a bit like vinegar. I am guessing the seller sent me a portion of an older culture so that there would be plenty of worms. When they arrived, I went out and bought my supplies to get my cultures going. What was needed included: sandwhich sized food storage containers, baby cereal, and a ripe banana

I poured about a 3/4" thick layer of gerbers baby cereal into 2 containers (one for walter worms, and one for banana worms). I poured in some water that I first ran through a brita filter and mixed it with a fork. I kept adding water until the mixture was pasty and easily worked, but not watery. Then, in one of the containers I added a 1/4 peice of a ripe banana and mushed that into the mixture. I mixed it up well so the banana was evenly spread through the baby cereal. I smoothed the top of both down. Banana Worms

The next step was to add the worms. In the container I mixed the banana into, I added the banana worm starter. I did my best to spread it evenly over the surface so all the worms could get food. I Walter Wormsadded the walter worms in the same way to the other container.

It has been a couple of days since I set up the cultures and if I hold them up to the light and look closely I can already see a ton of tiny worms moving around. They look more like little bits of glistening light. The worms should be kept in a dark, warm place, but should not be kept above 85*f.

To harvest some worms to feed, simply wipe them off the sides of the container. Once the culture has been going for a few days they should start to climb up the sides. A finger or popsicle stick works and you can either swish them directly into the fry tank or into a jar of dechlorinated water, and then use a dropper to feed them. They will live for 24 hours, possibly a bit more, in the tank water. This makes them a great food as they won't foul the water as quickly as some other foods.

According to the seller in about 10 days the culture will start to smell vinegery. At this point I should add a little it more baby cereal to the cultures to keep them going for a couple more weeks. Before I add the new cereal however, I should start up a new culture of each, so that when the old culture dies off, I will have a new one going. By continually doing this I can always have live foods available for newborn fry. Overall these seem like an easy to culture and feed live food for newborn fry. They are small enough for the smallest fry and even slightly bigger fry, like livebearer fry would probably like them.

Thank you to fishguy_1955 on aquabid for the great culture starters and great service:)

The Basics Of CO2 Injection For The Planted Aquarium

The Basics Of CO2 Injection For The Planted Aquarium

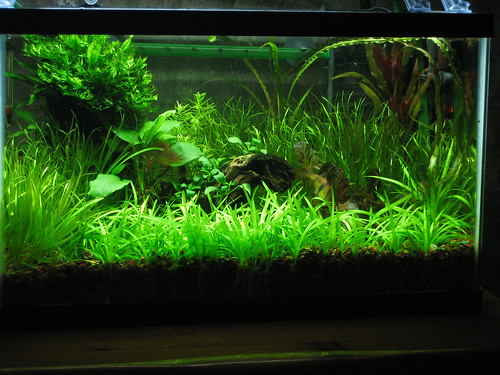
Providing some form of carbon to plants in a high light system is a necessity. Plants utilize carbon during photosynthesis to produce glucose, which is what the plants use for energy. In a high light situation the plants are growing quickly and require a lot of energy to maintain health and the quick growth, therefor they need a lot of carbon. One of the easiest ways to add supplemental carbon to your planted aquarium is via the use of carbon dioxide (CO2). If you have a low light tank additional CO2 is not usually neccessary. If you feel your plants in a low light tank are needing a carbon source try flourish excel.

DYI Yeast CO2
There are a couple ways to do add CO2 to your planted aquarium. One is to mix yeast, sugar and water in a container and run tubing from the container to the tank to some kind of "reactor". A reactor can be anything that delays the CO2 from reaching the surface of the tank, so that it can dissolve into your aquarium water. There are many different ways to make a "reactor", I will touch more on that below. If you do not want to make your own system you can purchase a ready made one like Hagen's Nutrafin Co2 Natural Plant System from your local fish store. Using the yeast method to get CO2 can work in smaller tanks, but the CO2 production is unstable and unreliable. For larger tanks it can become very time consuming making up enough bottles to keep up with your CO2 needs. Many people start out with yeast CO2 but soon tire of constantly having to remake the bottles of yeast, sugar and water.

Pressurized CO2
This is where pressurized CO2 injection comes into play. With pressurized CO2 you have a cylinder 
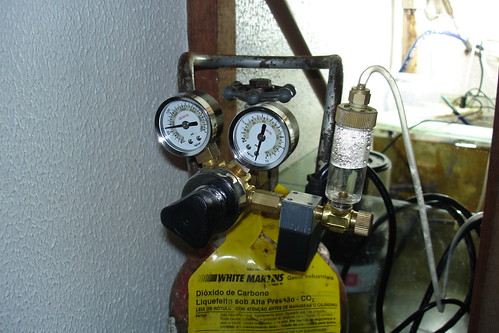
( aka tank) of liquid CO2, a regulator, a needle valve, a bubble counter (optional), and a CO2 diffusion reactor.

The Cylinder
CO2 cylinders are designed to hold liquid CO2. The pressure of a CO2 cylinder, filled is about 1,000 psi. It is important to use a cylinder that is specifically made to hold CO2 as others may not be able to handle the high pressure needed to keep the CO2 in liquid form. CO2 cylinders can be found in sizes from 2.5 pounds to 20 pounds. The most common size is 5 pounds. These can be found at wielding supply stores and beverage distributors. The cylinder may come in aluminum or steel. Both will work fine, the aluminum is lighter and does not rust, but cost more than the steel normally. Ideally you will want to buy a cylinder that is already filled, that you can take back to exchange for another one that is filled once yours is empty. If you purchase an empty cylinder you will need to find a place to fill it and you will also need to get it inspected regularly. The CO2 cylinder needs to remain in an upright position. Tipping it to the side can prove detrimental.

The Regulator
The regulator reduces the pressure coming from the cylinder to a more useable pressure. You will want a regulator that has a dual gauge. One side of the gauge tells you the pressure inside the cylinder, which will tell you when it is empty or almost empty, the other side tells you the pressure you are using, which you can adjust. A good quality regulator is important. When the tank gets close to empty the pressure decreases and this can cause the rest of the CO2 to suddenly leave the cylinder. This is called an "end of the tank dump". This will kill your fish. A good quality regulator will prevent this from happening.

The Needle Valve
The needle valve allows you to have more control on the amount of CO2 that you are putting into your tank. You want to be able to fine tune the amount of CO2 to keep it at the desired levels. To low and your plants will be lacking, to high and your fish will be floating. A guality needle valve will also help to prevent an "end of the tank dump".

The Bubble Counter
The bubble counter is an optional piece of equipment, but is very useful. The bubble counter allows you to see how many bubbles per minute are going into your tank. This allows you to fine tune the amount even more. Once you find out how much CO2 a certain amount of bubbles per minute gives you, you can adjust the flow without having to figure out the CO2 amount in your fish tank.

The Reactor
The CO2 diffuser/reactor is what mixes the CO2 into your aquarium water. There are many ways to do this. Some involve running the CO2 line to a power head or internal filter, which will make the bubbles smaller, providing more surface area for the CO2 to diffuse. Others are containers you put into your tank that hold the CO2 down in the water, allowing it to dissolve. Another way is to run the CO2 into a canister filter, this allows the water and CO2 to mix before going back into the tank. This allows CO2 rich water to run into your aquarium. There are many other ways to diffuse CO2 as well.

Another optional piece of equipment is a solenoid valve. Using this you can close off the CO2 at night and reopen it during the day without having to adjust your needle valve or the valve on the cylinder. Closing it off at night will preserve CO2 as the plants utilize oxygen (during respiration), rather than CO2 at night. Plants also produce CO2 at night, so adding more can be bad for your fish.

Adding pressurized CO2 to a high light tank can reap many benefits. It can cost anywhere from $80 to a couple hundred dollars depending on the equipment you purchase and the general prices of your area. Make sure your equipment is safe as a large tank of CO2 leaking into your house can be dangerous. If you are using appropriate, inspected cylinders and a good regulator everything should be fine. Remember, if you have a low light tank do not add extra CO2 to the tank. The plants will not be able to use it quickly enough and it may kill your fish.

Links about yeast CO2 injection:
http://www.plantedtank.net/articles/DIY-Yeast-CO2/7/
http://www.thekrib.com/Plants/CO2/co2-narten.html
http://www.netpets.com/fish/reference/freshref/co2.html
http://www.aquariumguys.com/nutrafinco2.html

Links about pressurized CO2 injection:
http://www.dlink.org/aqua/CO2.html
http://www.plantedtank.net/articles/Pressurized-CO2/19/
http://www.aquariaplants.com/pressurizedco2.htm
http://www.bestaquariumregulator.com/co2.html
http://www.theplantedtankfaq.com/CO2_FAQ.html

Photos from:

http://www.flickr.com/photos/bereninga/317810126/

http://www.flickr.com/photos/frankllin/124224131/

Keywords: CO2, CO2 injection, photosynthesis,

Cryptocorynes


Cryptocorynes are widely spread genus of plants. They can be found from Vietnam, Malaysia, Indonesia to India and New Guinea. The number of species that are known is increasing due to chromosomal research. Many plants that were thought to be varieties are actually different species.

Many of the crypts available come from Sri Lanka. These include C. wendtii, C. walkerii (C. lutea), C. undulada, and C. becketii. In the wild these are usually found in small streams growing in various types of soil, usually in acidic water. Some of the soil types they are found growing in are sand, clay and rotten leaf litter. These crypts are not only more available but also are perhaps some of the easier types to keep in aquaria.

Cryptocorynes are beautiful plants and are popular in the aquarium hobby. Some consider them difficult to keep because of their habit of "melting" when environmental factors are changed. Often when the pant is brought home its leaves will melt and it may take a month or two before the plant recovers from the transplant shock and begins to grow again. Other things, like changing light bulbs and large water changes can cause the crypts to melt.

To successfully keep crypts, the soil or substrate in the aquarium must contain lots of nutrients. Using a substrate with a clay base will often provide most of the nutrients needed. One can also put laterite underneath the gravel bed. Crypts also benefit from the use of fertilizer tabs or sticks placed near the root system. Crypts, like most plants also need light to grow. Cryptocorynes are considered a low light plant. This means they can easily be kept under regular fluorescent lighting. They can also successfully be kept under high light conditions. They also benefit form CO2 or some other source of carbon (such as flourish excel).

To prevent the dreading "melting" that is the bane of crypt keepers, make environmental changes slowly. If you have multiple bulbs over your tank, and they need changing, change one at a time, spacing them a few weeks to a month apart. Avoid large water changes, do more frequent smaller ones instead. Also, avoid doing heavy doses of fertilizers. Smaller dosing more often will work much better with the crypts. If your soil has enough nutrients crypts do not usually need much in they of liquid fertilizers.

Over all it does not take much to keep the more commonly available crypts happy. A nutrient rich soil and slow environmental changes are perhaps the two most important things to remember.

Picture credit: Wandering Angel

Saturday, July 21, 2007

Oscar care

Oscars (Astronotus ocellatus)

Oscar Oscars are possibly one of the most widely known and most popular of the cichlids. Many people who are not even into fish know what and oscar is. Their popularity is due to their great personality and their great appetite. Oscars quickly learn to recognize their owners and are more than willing to just about anything they think will fit into their mouth. Oscars are a member of the cichlid family that get up to 18 inches long and live to be 15 years old. They are native to south american and can be found along the Amazon river. They are normally found in slower moving areas of rives, tributaries and drainages.

Tank Size
One of the first things to consider when you are thinking of getting an oscar is the tank size they will need. These large fish need a lot of room. Many people try to keep them in 55 gallon tanks, however long term this size tank is inadequate. Oscars regularly grow to be 15 inches long, a standard 55 gallon tank is only 13 inches wide. Not only do the oscars get large, they produce a lot of waste. This means they need a lot of water to dilute the waste. For one adult oscar, by itself, a minimum tank size is 75 gallons. If you want to keep multiple oscars together you will be looking at tanks well over 100 gallons in size. Generally when concerning oscars, bigger is better. Young oscars can of course be raised in smaller tanks, but they grow very quickly. Many oscars will reach a foot long by the time they are a year to a year and half old. Make sure to have a secure lid with weights or clamps. Many oscars seem to enjoy knocking the lids off of their tanks if they can, and many will also jump.

Filtration and Heat
Because oscars are such big, dirty fish they require some heavy duty filtration. Large canister filters, overrated for the size tank, work great. Make sure to clean them out monthly or they will produce a lot of nitrate. Many people combine a canister filter with a power filter. Under-gravel filters usually do not work well with oscars as they tend to like to dig up the gravel and may even go after the gravel plate. A comfortable temperature range for oscars is 75-82*f. It is highly recommended to either put your heater in an external filter or put a heater guard around it as many oscars have destroyed their glass heaters shooting rocks at them. This can be dangerous for the fish and you. To determine the size heater you need, using 5 watts for every gallon of water is usually the recommendation. However with large tanks you can usually get by with a bit less, as a large body of water is less likely to change in temperature very quickly. 3 watts per gallon for large tanks usually works well. I find it best to use 2 smaller heaters, putting one heater on each end of the aquarium for an even temperature throughout the tank. For example. for a 75 gallon tank, using two 150 watt heaters usually works well.

Feeding
While many people like to feed their oscars feeder fish this is usually not a good idea. Feeder fish are lacking in many nutrients the oscar needs and they can bring in a lot of different problems including parasites, bacteria and fungal infections. If you really want to feed your oscars feeder fish, breed your own. Using convicts or mollies usually works. Make sure to feed the feeder fish a high quality food and keep them healthy so your oscar is getting healthy food. A better way to feed your oscar is with a large variety of pelleted and frozen foods. Feeding a few different high quality brands of pellets, along with krill, blood worm cubes and seafood from a grocery store will help keep your oscar healthy. One of the pelleted foods should be a plant based food to insure your oscar is getting his vegetables:) Baby fish under 4 inches should be fed 2 to 3 times a day. Adolescent fish, between 4 and 8 inches can be fed 1 to 2 times a day. Fish 8 to 12 inches can be fed once a day and adult fish 12 inches and large can be fed every other day. Feed until the oscars belly looks slightly rounded. The oscar may appear to keep eating even after this point, but most of the food will end up coming out the gills and dirtying the tank even faster.

Decorations
Decorations should be minimal as oscars tend to like to move things around. Avoid heavy object 
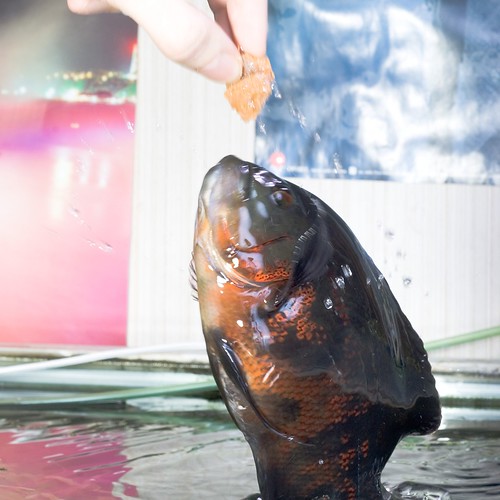
that could fall on them as they move gravel around and avoid large stones they can pick up as you may come home one day to find your tank shattered and your fish and water on the floor. Generally, a piece or two of driftwood and some well made fake plants work well. Remember that oscars are big fish so do not take up a lot of room with decor. When cleaning, make sure to clean under and around all decorations and debris tends to accumulate there.

Cleaning

As stated before, oscars are very dirty fish and also need very clean water. Dirty fish need to have their tanks cleaned often. For an appropriately stocked and filtered oscar tank (ie: a 75 gallon, over-filtered with 1 oscar) you should change about half the water weekly. This may seem like a lot, but oscars really are dirty fish. They are also sensitive to poor water a quality. If your tank is over stocked, twice weekly or more change half the water. Having a test kit will help you determine if you are changing enough water. Ammonia and nitrite should both be at 0 at all times. Nitrates should be kept, ideally, under 20ppm. The pH is not of much concern as long as it remains stable. When doing a water change make sure to vacuum the gravel well. I find it easiest to do one half at one water change, and the other half the next, alternating back and forth between the two sides. The filters should be cleaned at least once a month, sometimes twice a month, depending on how dirty they get.

Tank-mates
If given a large enough aquarium there are many fish that are compatible with oscars. Some include bala sharks, tinfoil barbs, jack dempsys, pacu (if you have a very, very large aquarium),Green Severum silver dollars, larger clown loaches, most larger catfish, severums , chocolate cichlids and more. To keep oscars with other fish, especially if they are cichlids, a 150 gallon tank or larger is recommended. Make sure the fish are close in size to the oscar so they are not viewed as a potential snack. If you want to keep oscars together, keep either a pair, or keep 6 or more. Often if you only have 3 or 4, the dominant ones will constantly harass the weakest one until it dies, and then the next weakest and so on until you are left with only one or two oscars. Because a tank large enough to keep 6 adult oscars together is not usually feasible, it is best to keep them in a pair, alone or with other compatible fish.

Varieties

Albino Oscar
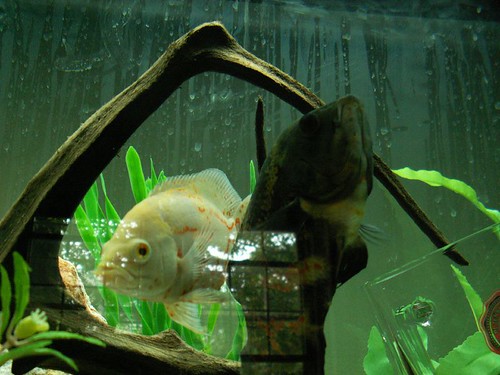
Oscars now come in a few different varieties. These include, red oscars, red tiger oscars, albino oscars, gold oscars and long finned oscars.

Photo Credits:

http://flickr.com/photos/staceydicks/327737605/

http://flickr.com/photos/marcuspajp/88333757/

http://flickr.com/photos/everyskyline/538968810/

http://flickr.com/photos/firemouthus/146140966/

http://flickr.com/photos/everyskyline/538968884/

Monday, July 9, 2007

Trying a new fertilization regime, Estimative Index

I am going to give the estimative index fertilization a try. I do not want to do such large weekly water changes though so my doses are going to be a bit lower than recommended. I am planning on weekly 30% water changes on my 60 gallon tank (so roughly 18-20 gallons a week). Estimative Index recommends 50% weekly water changes. I do not think my crypts will like that, and I just don't want to do that much.

Tank stats: 60 gallon heavily planted 110 watts PC and 64 watts of normal output (regular) fluorescent lighting (2.9 watts per gallon, but 1.8 of it is PC light) - 12 hours a day 3 Hagen yeast CO2 systems, changed every 3 weeks Substrate is 4-5 inch gravel bed with 60 grams of laterite

My fertilizer regime is going to go like this:

Sunday, Tuesday, Thursday : 1/4 tsp of KNO3, 1/16 tsp of KH2PO4, 1 capful flourish excel

Monday, Wednesday, Friday : 1/16tsp of trace elements (CSM+B Plantex), 1 capful flourish excel

Sunday am : 18-20 gallon water change, 1/4 tsp GH booster (has Potassium Sulfate, Calcium Sulfate and Magnesium Sulfate). Start over with dosing regime.

Every 3 months : 3 flourish tabs (at the base of swords and crypts)

I just purchased my fertilizers from www.aquariumfertilizer.com, so I will be starting once they get here. I may find I need to up my doses a bit, but we shall see how this goes. I am concerned I may need to add extra iron, but again we will see. If it is needed I will probably just use Flourish Iron and start at 1/3 the dose they recommend since the trace elements should have some iron in it. I may also find I do not need the GH booster. I plan to test my GH weekly for awhile and see what it does. This should be an interesting experiment.

Links about estimative index:
The Barr Report - Estimative Index
Greg Watson's Aquatic Plant News - Estimative Index

Aquatic Plant Central - Estimative Index Dosing Guide


I also posted some of this on aquariphiles.com and google's TFA group